Enduring Traditions

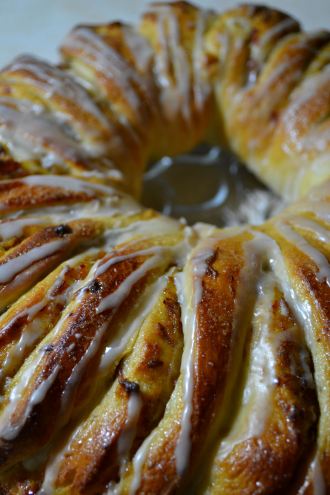
Swedish Tea Ring

My mother and I were looking through her recipe box, filled with recipes from my great grandmothers and my grandmother.  We do this every Christmas when looking for my Great Grandma Yates’, tried and true, sugar cookie recipe (which no Christmas is complete without).  However, we came across a recipe that my grandma would make each Christmas for her neighbors, so I wanted to do the same for mine.

Tea Ring

5 1/4 cups  All-purpose flour

2 packages active rise yeast

1/2 cup sugar

1 teaspoon salt

1 cup milk

1/2 cup water

1/4 cup butter

2 eggs

1 egg, slightly beaten

1 T milk

Sugar

Date-Orange Filling

2 cups chopped dried dates

1/2 cup orange juice

1 teaspoon sugar

Icing

2 cups sifted powdered sugar

1 teaspoon vanilla

2 T milk (more if needed)


Prepare filling.  In a small saucepan, combine all ingredients.  Bring to a boil.  Simmer about 3 minutes, until thickened; cool completely.  If filling becomes too thick, add orange juice to thin.  Filling for 2 large tea rings.

In a large mixing bowl, combine 2 1/2 cups flour, yeast, sugar and salt; mix well.  In a microwave proof bowl or small saucepan, heat milk, water and butter until very warm (120 F to 130 F; butter does not need to be melted).  Add to flour mixture.  Add 2 eggs.  Blend at low speed until moistened; beat 3 minutes at medium speed.  By hand, gradually stir in remaining flour to make a soft dough.  Knead on a flour surface until smooth and elastic, 5 to 8 minutes.  Place in a greased bowl, turning to grease top.  Cover; let rise in warm place until double, about 1 hour.

Punch down dough.  Divide into 2 parts to make 2 large rings.  On a lightly floured surface, roll each half to a 15-by-12 inch rectangle.  Spread with half of the date filling for each rectangle.  Starting with the longer side, roll up tightly.  Pinch edges to seal.  Form ring, pinch ends to seal. Place each ring seam side down on a greased cookie sheet.  If small tea rings are desired for a more modern take, slice each roll in half (to make 4 small rings) and join ends.  With scissors, make cuts 1-inch apart through top of ring to 1-inch from center.  Turn each slice on it’s side.  Cover let rise in a warm place for 30 minutes or until doubled, about 30 minutes.  Combine egg and 1 tablespoon of milk; gently brush tea ring.  Sprinkle with sugar.  Bake at 350 F for 20 to 25 minutes or until internal temperature is 200 F and golden brown.  Remove from cookie sheets and cool.

Mix icing ingredients in a small bowl and drizzle over cooled tea rings.

xo Amanda


Boston “Cream” Pie

Image

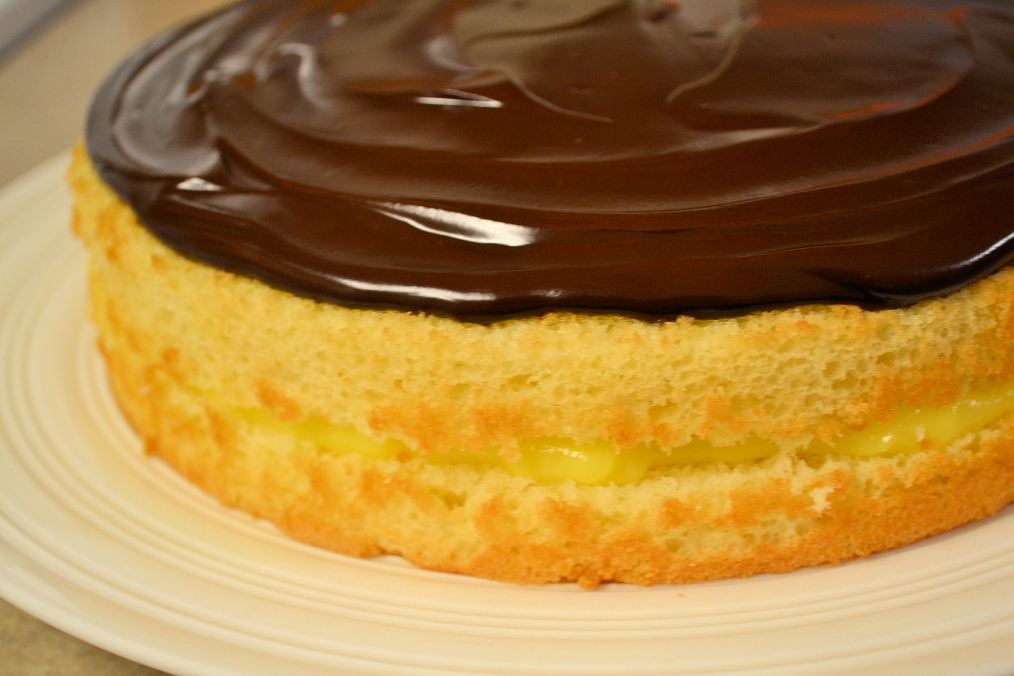
Just recently, I have not been able to consume dairy…which has been extremely difficult because I grew up on dairy products.  Not only that, I have a large sweet tooth.  I needed to bring an item to my Foundations II class (seeing as I missed a day because I was in lovely San Antonio for a food conference).  Looking at the list of approved recipes, it did not look like I’d have time to “roast a whole turkey” or create “Juila Child’s Beef Bourguignon”.  I settled on the Boston Cream Pie.  I was a little disappointed by the fact I would not be able to eat it because the infamous Boston Cream Pie’s filling uses whole milk.  However, with determination I decided to wing it and use rice milk instead.  To my surprise, the cake and the pastry “cream” turned out wonderfully.  I am looking forward to sharing it with my class.

Boston “Cream” Pie

Serves 12

Cake

1 cup + 2 T sifted cake flour
2/3 cup sugar
1 1/2 teaspoons baking powder
1/4 teaspoon salt
1/2 cup rice milk
1/4 cup cooking oil
2 egg yolks
1 teaspoon vanilla
2 egg whites
1/4 teaspoon cream of tartar

Pastry Cream Filling


2 cups rice milk
1 teaspoon vanilla extract
6 egg yolks
2/3 cup sugar
1/4 cup cornstarch
1 T unsalted butter

Ganche

1 stick unsalted butter
8 oz semi-sweet chocolate chips

Preheat oven to 350 F.  Grease and parchment line bottom of 9″ cake pan.  In a mixing bowl, combine flour, sugar, baking powder, and salt.  Combine milk, oil, egg yolks, and vanilla.  Beat on low speed until combined.  Beat an additional 3 minutes on high speed and set aside.  White egg whites with cream of tartar on high speed until medium stiff peaks.  Add the whipped egg whites to egg yolk mixture.  Gently fold until well incorporated, being careful not to deflate batter.  Pour batter into cake pan.  Bake for 25-30 minutes until the top springs back when slightly touched.  Cool for 15 minutes and remove from cake pan.

For the pastry cream, heat milk in a small saucepan until very hot.  Combine egg yolks, cornstarch, and sugar right before milk reaches temperature (do not mix sugar into egg yolks too soon or it will burn them).  Add 1/3 of the hot milk to the egg yolk mixture while whisking.  Pour mixture into sauce pan.  Cook while constantly stirring with a whisk until mixture thickens; be careful to stir corners of saucepan or mixture could burn.  Cook 1 more minute, still stirring.  Strain mixture.  Add vanilla extract and butter.
For the ganache, add butter and chocolate chips (reserving 2 tablespoons of chocolate) to a heat-proof bowl over a pan of simmering water.  Heat until melted.  Add reserved chocolate and mix until melted.  Cool to room temperature, but still spreadable.
For assembly: Cut the cake in half horizontally.  Spread pastry cream between layers (you won’t use all the cream FYI).  Top with second layer of cake.  Pour chocolate ganache over top and either let it drizzle down the sides or use an offset spatula to spread it only to the edges.  Store in refrigerator until serving time.

My Comfort Food

Banh Mi

With graduation approaching, it is hard not to feel a bit frantic about how unstable my life will become in the next few months.  The most comforting thing to me right now is cooking and my comfort foods.  The banh mi is one of those foods for me.  It reminds me of summer days, surrounded by family, eating banh mi on-the-go (like what is traditionally done).  My favorite banh mi is one filled with cold meats, which still tastes great after being slightly warmed by the sun (or squished in a backpack).  Banh mi sandwiches are stuffed with cucumbers, jalapenos, cilantro, pickled carrots and daikons, pate, and headcheese.  There is nothing like eating banh mi on a hot day–the jalapeno’s heat lying parallel with the sun’s is bliss.

The headcheese I used for this sandwich is one that my professor taught me how to make.  To most people, headcheese may not sound comforting but, both of us, have strong memories associated with it.  Even though her and I come from different cultural backgrounds, it is fascinating to see how food and culture converge.  Please visit Dr. Georgia Jones’ blog for the recipe: http://discoveringfoods.blogspot.com/2012/02/holding-on.html.

Banh Mi
Serves 4

Banh Mi Condiments

1 cucumber sliced on a bias into 1/4″ pieces
cilantro
1 jalapeño sliced on a bias into 1/8″ pieces
headcheese sliced into 1/8″ pieces
4 demi-baguettes or 1 baguette cut into 6″ pieces
soy sauce

Slice baguette in half, but not all the way through the bread. Spread the pâté on one side and the mayonnaise on the other side. Place 3-4 pieces of cucumber to one side of the bread, then the slices of head cheese and jalapeno to taste. Top with pickled carrots and daikon and cilantro. Sprinkle the insides of the sandwich with soy sauce.

Coconut Mochi with Red Bean-Chocolate Filling

I’m positive I’m not the only one that’d like to receive something other than a box of chocolate for Valentine’s Day. Don’t get me wrong…I love chocolates, but truthfully, it is a bit prosaic these days.  Why not reinvent that tradition?  Being biased and all to asian treats, I may not be the best person to tell you mochi would be a good Valentine’s gift…but I’m going to.  Want to know why?  They’re chewy, perfectly sweet, and this recipe includes a hint of coconut.  If that’s not enticing enough, the insides are filled with rich tasting red beans enlivened with dark chocolate.  As a reader, I understand you might be skeptical at this point…because let’s see…we have coconut, which people either extremely hate or desperately love (I happen to be the latter) and beans??  I ask you to blindly trust me on this one.  Package them into candy boxes and give them to loved ones.  To keep them from sticking together, use mini cupcake liners.  To make them even cuter, cut the edges of the cupcake liners into a flower shape.  The recipient will be delighted.

Coconut Mochi with Red Bean-Chocolate Filling  (makes about 30)

1 18 ounce can of sweetened red bean paste*
2 squares of Ghirardelli 100% cacao unsweetened baking bar, melted
1 cup water
1 cup sugar
8 ounces Mochiko rice flour
1 cup coconut milk
potato starch, for dusting*
* Can be found at an Asian market

In a bowl mix the red bean paste and melted chocolate together. Set aside. In a small saucepan, mix the water and the sugar together.  Heat over medium heat until the sugar completely dissolves.  Remove from heat.  In the meantime, mix the flour and coconut milk together in a large microwave proof bowl.  Cover and microwave for 5 minutes on high.  Carefully remove and stir well.  Cover and microwave for an additional 5 minutes.  Stir again.  Pour the sugar mixture into the flour mixture and mix until fully incorporated (the liquid will look like it won’t absorb but with patience it will). Turn out the mixture onto a well dusted cutting board or cookie sheet (be careful it’s very hot and sticky at this point). Dust your hands with the starch as well so it won’t stick to you. Pinch off a 2 inch piece of dough, roll it into a ball, and flatten it into a disk. Place a small amount of the red bean filling in the center. Gently enclose the filling with the dough and place finished mochi in a mini cupcake liner seam side down.  Repeat with remaining dough and filling.

Happy Chinese New Year! (新年快乐!)

Normally, my blog is for posting dessert recipes but since Chinese New Year is around the corner, I’ll make an exception.  Chinese New Year is full of symbolism and superstition; it is believed that appearance and attitude during New Year’s will set the tone for the rest of the year.  People do not sweep or dust their homes in fear they will sweep away good fortune.  Red clothing is worn to bring the wearer a bright future and children receive “hong bao” which are red envelopes with crisp, new dollar bills inside for good luck.  Certain foods are also eaten because their Chinese names are homophones for words like wealth or luck.  For example, the word for tangerines sounds like the word for “luck” in Chinese, so friends and families give them as gifts.  Also, nian gao (which means sticky rice cake), is eaten on New Year’s because it sounds like the phrase “year growing taller” supposedly giving the eater a better year than the last.  Many families realize these superstitions are merely that, but they continue to practice the traditions to so they can pass down Chinese heritage to their children.  One treasured tradition is dumpling making which is also a very symbolic food.  Dumplings are called “jiao zi” which was the old term for ancient Chinese money because the gold and silver pieces had a dumpling-like shape.  Essentially dumplings are symbolic for eating money and it is believed the person will have prosperity, luck, wealth (and hopefully a full stomach too).  To me, one of the most important aspects of Chinese New Year is the food.  Where there is food and families, bonds are strengthened and memories are created.  Many Chinese families treasure dumpling making on New Year’s because of these statures.  Usually one family member will roll the dough, and the rest will fill and pleat the dumplings; they will all talk and enjoy valuable family togetherness.  I find particularly special that each person has a certain dumpling “thumbprint”; in other words, at the dinner table one can usually tell who has made which dumpling as they are eating.  Chances are you may not celebrate Chinese New Year, but I encourage you to make these dumplings with your family or even try making nian gao (the recipe can be found here https://swirledandsprinkled.wordpress.com/2010/05/10/nian-gao%E7%B2%98%E7%B3%95/).  Also, check out more Chinese New Year dishes here: http://go.unl.edu/8ie.  Until then, I wish you all the happiest New Year, one with much luck, fortune, good health, and prosperity…may this year be brighter than your last. 新年快乐!(Happy New Year!)

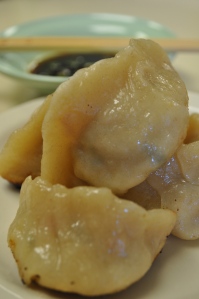
Pork and Scallion Dumpling (makes about 12) 

For the dough:

1 cup all-purpose flour

3/4 teaspoon salt

1/2 cup boiling water

1. In a medium bowl, combine flour, salt, and boiling water. Using a wooden spoon, mix until the dough forms a shaggy ball, then transfer to a lightly floured surface and knead until the dough is smooth (about 8 minutes). Wrap lightly in plastic wrap and let rest at room temperature for 20 minutes. While the dough rests, make the filling.

For the filling:

1/2 lb. ground pork

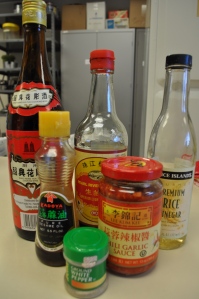
1/2 tablespoon Shaoxing wine*

1/4 teaspoon sesame oil

1/2 teaspoon chili-garlic sauce (Lee Kum Kee Brand)*

2 teaspoon minced ginger

1/2 teaspoon rice vinegar*

2 teaspoons soy sauce*

Pinch of white pepper powder*

3 tablespoons finely chopped cilantro leaves

* See the bottom of this post for pictures of the ingredients.

1. In a medium bowl, combine all ingredients and mix well. Keep refrigerated until ready to fill the dumplings.

Roll out wrappers:

1. Roll dough into a 1 inch diameter log on a lightly floured surface. Cut dough into 1 inch pieces.

2. Using a rolling pin, roll out each piece of dough into a 4 inch diameter circle. Set aside and repeat with the remaining pieces.

Fill and pleat dumplings:

1. Lightly dust a baking sheet with flour.

2. Hold a wrapper in the palm of your hand. Place a heaping tablespoon filling in center of wrapper.

3. Fold wrapper in half without sealing the edges, open-side up, gently press down filling.

4. Using thumb and forefinger of left hand, begin pinching edges of wrapper together while pushing one edge into tiny pleats with thumb of right hand. Continue pleating and pinching across entire semicircle until wrapper is sealed (the unpleated side will naturally curve). Set dumpling on floured baking sheet pleated side up. Repeat.

Pan-Fry dumplings:

1 1/2 tablespoons vegetable oil

In a large lidded nonstick skillet, bring heat 1 1/2 tablespoons vegetable oil until hot. Add dumplins, pleated side up (don’t let them touch) and immediately pour cold water to pan to come half-way up the sides of the dumplings. Cover and cook until all the liquid has evaporated and the bottoms are browned and crispy, about 10 minutes. Make sure to check the bottoms of the dumplings after about 5 minutes and keep checking after 1 to 2 minutes. Transfer to a platter crisp side up.

Lucky dumpling sauce (serves 4)

4 tablespoons soy sauce*

1 tablespoon rice vinegar*

1 teaspoon chili-garlic sauce (Lee Kum Kee Brand)*

1/2 teaspoon Shaoxing wine (optional)*

1. Combine all ingredients and serve with dumplings. Add more chili-garlic sauce separately if you like more heat.

This is a long recipe, but it’s worth it. Enjoy!

Chocolate-Red Wine Cake

I know I am obsessed with food. I confess. After I met this cake (yes, met) I decided I might be borderline crazy. I ordered it off the menu of a new restaurant near my home. Honestly, the only reason I did was because I had seen a similar recipe before…somewhere…nothing else crossed my mind.

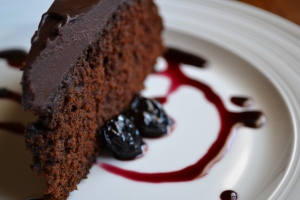
Then the dessert came out to my table in all its chocolaty beauty on top of a plate drizzled with a cherry red wine reduction. Let me tell you:

It. Was. Amazing.

The bitterness of the chocolate ganache perfectly complimented the reduction with its tang from the wine and the cake itself had a slight boozy flavor. Days after I ate this cake, I could not stop thinking about it (my justification to why I am crazy). Where did I see this cake recipe before?? I began to scour my cookbooks fruitlessly. I gave up. I mustered up some hope and looked online for recipes and found nothing interesting. I gave up again.

One day the clouds opened up…and I swear one of my cookbooks just fell open and the recipe laid in front of me. Here it is, it’ll change you.

To make the cake (Adapted from Anne Willan’s Cooking with Wine):
2 1/4 cups cake flour
1 cup unsweetened cocoa powder
1 1/4 teaspoons baking soda
1/2 teaspoon salt
2 sticks unsalted butter, room temperature
1 3/4 cups granulated sugar
2 large eggs, room temperature
1 teaspoon pure vanilla extract
1 1/4 cups dry red wine (I used Indian Wells Merlot)

1. Preheat the oven to 350 F.  Butter and flour a 10 inch round cake pan.  In a bowl, whisk the flour, cocoa powder, baking soda and salt together.

2. Using a handheld or a stand mixer, beat the butter with the granulated sugar until fluffy (about 4 minutes).  Add the eggs one at a time and beat until incorporated.  Add the vanilla and beat for 2 minutes.  Alternately add the dry ingredients and the wine in 2 batches, stirring until just incorporated.

3. Scrape the batter into the prepared pan and bake for 45 minutes, or until a toothpick inserted into the center comes out clean.  Let the cake cool in the pan for about 10 minutes, then turn it out onto a cooling rack.  Cool completely.

To make the cherry red wine reduction:
1/3 cup frozen dark cherries
1 cup dry red wine (use the same wine used in the cake)
4 tablespoons granulated sugar

1. Add the cherries to a small saucepan over medium-low heat for 5 minutes to evaporate the water.

2. Add the wine and the sugar.  Stir.

3. Simmer over low heat until the wine has reduced by about 2/3 (about 35-40 minutes).  Set aside to cool.

To make the ganache:
8 ounces bittersweet chocolate, finely chopped
1 cup + 2 tablespoons heavy cream
1/2 stick unsalted butter (cut into 4 pieces), room temperature

1. Place the chopped chocolate in a heatproof bowl.

2. Bring the heavy cream to a boil, then pour it over the chocolate.  Stir in small circles first, starting in the center, working your way to larger circles to blend the mixture.  When the ganache is smooth and shiny, stir in the butter, one piece at a time.  Stir only until incorporated–the less mixing you do the shinier the ganache will be.

3. Let the ganache come to room temperature until it thickens (it should be thick enough to frost a cake with).

To assemble the cake:
Pour 3/4 of the cooled ganache over the cake.  Using a straight spatula frost the top and the sides of the cake evenly.  Drizzle plates with the reduction, top with a slice of cake, and pile a few cherries on the side.

Nian Gao(粘糕)~


During Chinese New Year, people eat nian gao (粘糕) a sticky rice cake whose name also sounds like the Chinese words 年高. Cleverly named, nian gao can also take on the meaning that each “year is taller” wishing the person who eats it a better year than the one before.

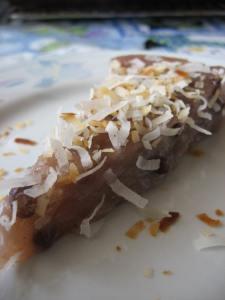
I was visiting my boyfriend’s parents for Chinese New Year the first time I tried this dessert…and I fell in love. Sticky glutinous rice cake (already my favorite thing in the world), with sweet red beans (another favorite of mine), and coconut (ANOTHER FAVORITE!). By the time I was halfway finished with the cake, I was already sent off into chewy, coconuty bliss…call me a food nerd…I know its true.

I am not sure which was the most motivation for me make the recipe myself…that fact I caught myself daydreaming about it days after I tried it and craving it like no other…or the urge to recreate the experience for my family (also of Chinese descent). I scoured recipes, trying to find the best one, but I was left disappointed. None of the recipes included coconut milk unless it was a baked version (my oven is currently un-usable…) and most of the recipes used the traditional method of steaming. So, I took information from the recipes I could find and I changed it to my needs…

Nian Gao Recipe

3 cups red beans
3/4 cup sugar
4 cup water
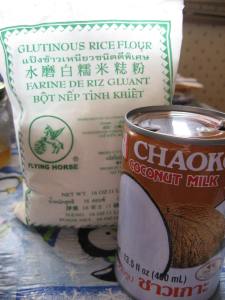
16 oz. glutinous rice flour
1 cup coconut milk

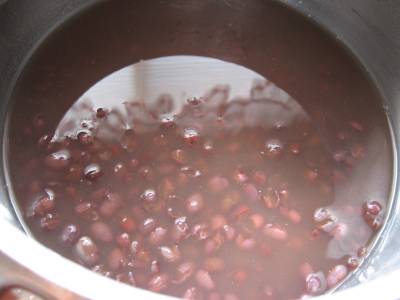
Soak red beans over night with enough water to cover them. The next day drain the beans and place in a medium sauce pan and add 4 cups of water. Simmer on low heat for 1 1/2 hours or until beans are soft and cooked through. Add the sugar to the beans. Taste. Adjust the sweetness to your own taste. Cool the mixture.

Red beans

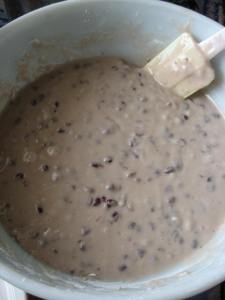
After the beans have cooled, put the glutinous flour into a large mixing bowl. Add 1 1/4 cup sugar. Add 2 cups of red beans (including the liquid) to the flour. Fold together. Add 1 cup of coconut milk and fold again. If the mixture looks dry add some of the bean liquid one spoon at a time folding in between additions. The dough should look sticky, gummy, and not runny.

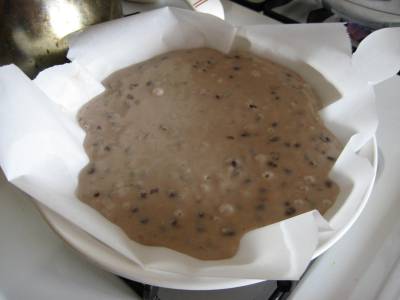
Pour mixture into two 8 inch pie pans lined with parchment paper (the parchment paper will stick out from underneath the dough). Place in a steamer and steam for 1 1/2 hour or until a toothpick inserted into the center comes out clean (since the dough is naturally sticky…”clean” assumes that some of the cake will still stick to the toothpick but it should not be runny and it will be translucent).

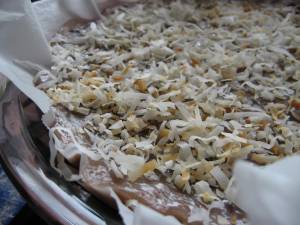
Toast coconut in a dry pan and sprinkle on top of nian gao. Serve.

Chocolate Lover’s Fantasy 2010

I’m so glad to be writing posts again! School has been incredibly busy for me and I haven’t had time to post…I am going to try very hard to put something up regularly, despite how much school work I have…Besides that, I officially changed my major to Culinology and, honestly, I have never been happier. Just like most college students, I struggled with deciding what I wanted to do with my life. My mom always advised me to “follow my heart” and, as easy as that sounds, it’s the most difficult yet the best advice to follow. However, in the end, I discovered what it truly means to “follow your heart”…it took my whole life of experiences for my heart to know what it wanted and then it took the last few years for me to decode my heart’s language and to find the courage to listen… 
This February was the annual Chocolate Lover’s Fantasy at the Embassy Suites in my hometown. The convention hosted chefs from local restaurants, each of which put on a displays with tastings. I thought it would be a good experience for me to be around other food lovers and to see what kind of creativity chefs bring to a very well-known medium: chocolate.

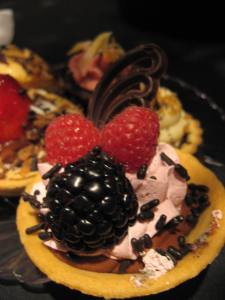
The first table I made a stop at was Embassy Suites.  I was so impressed (and my stomach was so anxious) by their tartlets.  Plus, all the flavor combinations were very creative. 

Embassy Suites' Table

 My favorite were the two below…

A dark chocolate ganache with a hazelnut cream cheese topping

Milk chocolate pudding tart with raspberry mousse and sprinkles

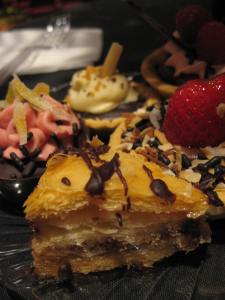
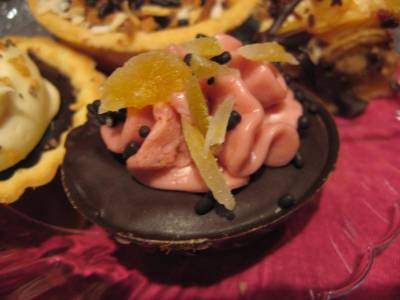
 These are some more from the Embassy Suites table…

Bakalava with chocolate and almonds

Mango-chile chocolate with pomegranate mousse

The next table was Russ’s Market (with a poor woman trying to fill cannoli on the spot and keep up with demand).

Russ's Market

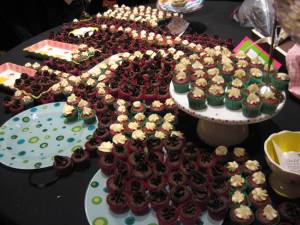
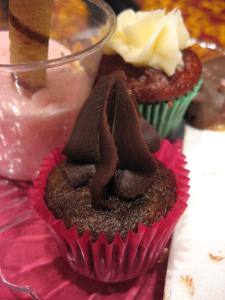
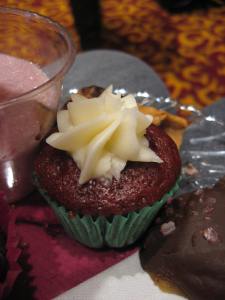
 Then came Sweet Pea’s Bakery…the table was filled with mini cupcakes!!  They were so adorable.  People love small desserts because then they’ll have room to try other flavors…and by having mini cupcakes this is achieved.  The next time my friends come over…I want to do this for them!

Sweet Pea's Bakery

Chocolate cupcake with chocolate ganache frosting

Red velvet cupcake with cream cheese frosting

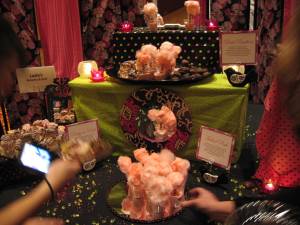
 Another table was Lazlo’s Brewery and Grill.  Their theme was “Pretty in Pink” :]  They had pink cotton candy spun on cookie sticks and homemade caramel dipped in chocolate with pink Himalayan sea salt (the combination of salt and caramel was sooo goood).

Lazlo's Bar and Grill

Other restaurants represented that night was the Red Onion Grill, Dish, Runza, The Mill, the Cup, Venue, and Colby Ridge Popcorn.

The night was really fun (despite the fact I went alone).  I came home with my sweet tooth overly satisfied and brought home a few samples for the fam :]

Piped Sugar Cookie Flowers and Butterflies

Currently, my oven is leaking gas…which means I can’t bake until it’s fixed!  How depressing…

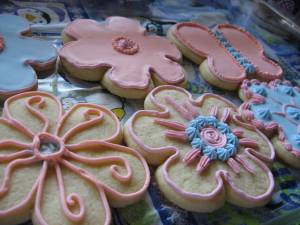
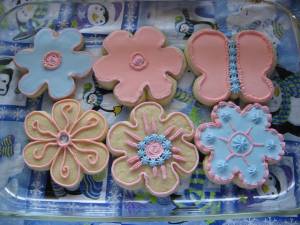
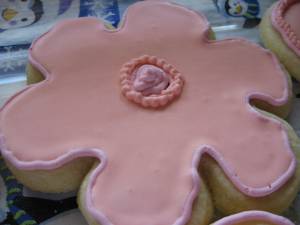
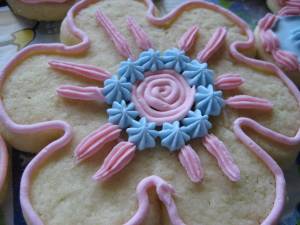
So I managed to find some old pictures of piped sugar cookies I had made last year as practice for a craft fair table I was going to have.  The craft fair idea didn’t hold through, but I learned how to pipe sugar cookies.  A time-consuming yet fun and rewarding process.  I surprised my close friend with some of these cookies and it made me feel good to know that I left her with a happy stomach, a smile on her face, and a rejuvenated spirit.  There is almost nothing better than eating something delicious from someone who cares about you.  Give these cookies as a gift, packed in a treat bag and tied with a ribbon.  Or just keep them for yourself!  There’s no harm in that. 😉

Recipe:

Makes about 7 large cutout cookies.  This recipe adapted from Baking by Dorie Greenspan.
For the dough:

1/2 teas. salt
1/2 teas. baking powder
1 stick unsalted butter, room temperature
1 cup sugar
1 large egg
1 large egg yolk
1 teas.vanilla extract

For the Royal Icing:

4 cups powdered sugar
2 Tablespoons meringue powder
6 Tablespoons water
Wilton’s Gel Food Coloring

Tools:

At least one Wilton’s #3 piping tip
At least one pastry bag with coupler
(If you want to pipe multiple colors, having more than one piping tip and bag will be necessary. One bag and tip for each color is ideal, but not necessary-read recipe for more info)

Sift the flour, salt, and baking powder together in a bowl.

Using a stand mixer with a paddle attachment or a hand mixer in a large bowl, beat the butter on medium speed until creamy. Add sugar and beat for 2 minutes, until mixture is pale and fluffy. Add the egg and yolk and beat for another minute until incorporated. Beat in vanilla. Reduce mixer speed to low, slowly add the flour and mix until just incorporated. Finish blending the dough with a rubber spatula (you don’t want to over mix sugar cookie dough).

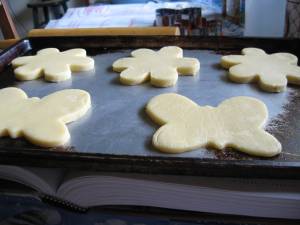
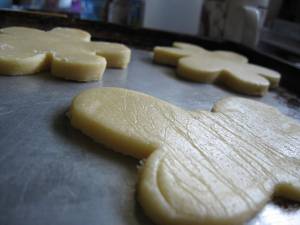
Divide the dough in half and place each half on a piece of plastic. Shape dough into a disk and wrap. Refrigerate the dough for about 2 hours, until chilled. Once dough is chilled, keep the plastic on and using a rolling-pin, roll each disk until it’s 1/4 inch thick. Cut cookies out with cookie cutter and place them on a cookie sheet about 1/2 inch apart.

Center a rack in the oven and preheat the oven to 350 degrees F. Bake them in the oven for 9-11 minutes until firm and still pale. Let them cool on cookie sheet for 1 minute and then transfer them to a cooling rack until they are room temperature. Cookies must be at room temperature before piping frosting on them.

Repeat with the rest of the dough, cooling the cookie sheets between each batch. The dough can be wrapped and refrigerated for up to 3 days.

While cookies are cooling, make the royal icing. Combine all the ingredients in a mixing bowl and mix for 7-10 minutes or until the icing loses its shine. This consistency of icing is perfect for piping outlines on the cookies. If you would like to have different colored icing, separate icing in smaller bowls for each color you want to have. Having many colors to pipe gets tricky when you don’t own many piping tips and bags. However, it is do-able. If anything, you can have many piping bags and only one or two #3 piping tips (just clean and interchange the piping tips between colors).

Pipe an outline on the cookie with desired color and let icing dry. Repeat with all the cookies.

With left over icing, add a few drops of water at a time, mixing after each addition until the icing becomes a liquid consistency. To test the consistency of the icing, let some of the icing drop into the bowl. Count to 10 seconds, the droplet should have disappeared in exactly that amount of time.

To fill the cookies in with the thinner royal icing, drizzle a small amount over the entire cookie. Use a toothpick to push the icing to the inside edges of the outline you made before. Let te icing dry. Tada!  Now you have a pretty, shiny, royal icing frosted cookie!

~Amanda